Welcome to our website.
We are living in strange times, and we count ourselves fortunate to be able to continue communicating with friends and family, even if we can't give them a physical hug.
We're not booking any physical fayres at the moment, but we hope to be back out 'on the road' before Christmas. If you'd like us to come along to your event just drop an email to This email address is being protected from spambots. You need JavaScript enabled to view it. and we'll see what we can do. We have tried a few Virtual Fayres - follow us on Facebook to find out where we'll pop up next.
The on-line store is up and running, and we are stocking it with more goodies each month. You can see some of our latest listings in the shop at the head of this page - just click to go directy to the shop.
You can also find us here on Facebook.
When I started working with glass at home, I didn't realise how much 'scrap' glass there would be. But if you think about it, glass isn't like pastry - you can't roll up the offcuts and use them.
So we needed something to do with the offcuts of clear, coloured and patterned glass that we have built up. Enter the Fruit Bowl.
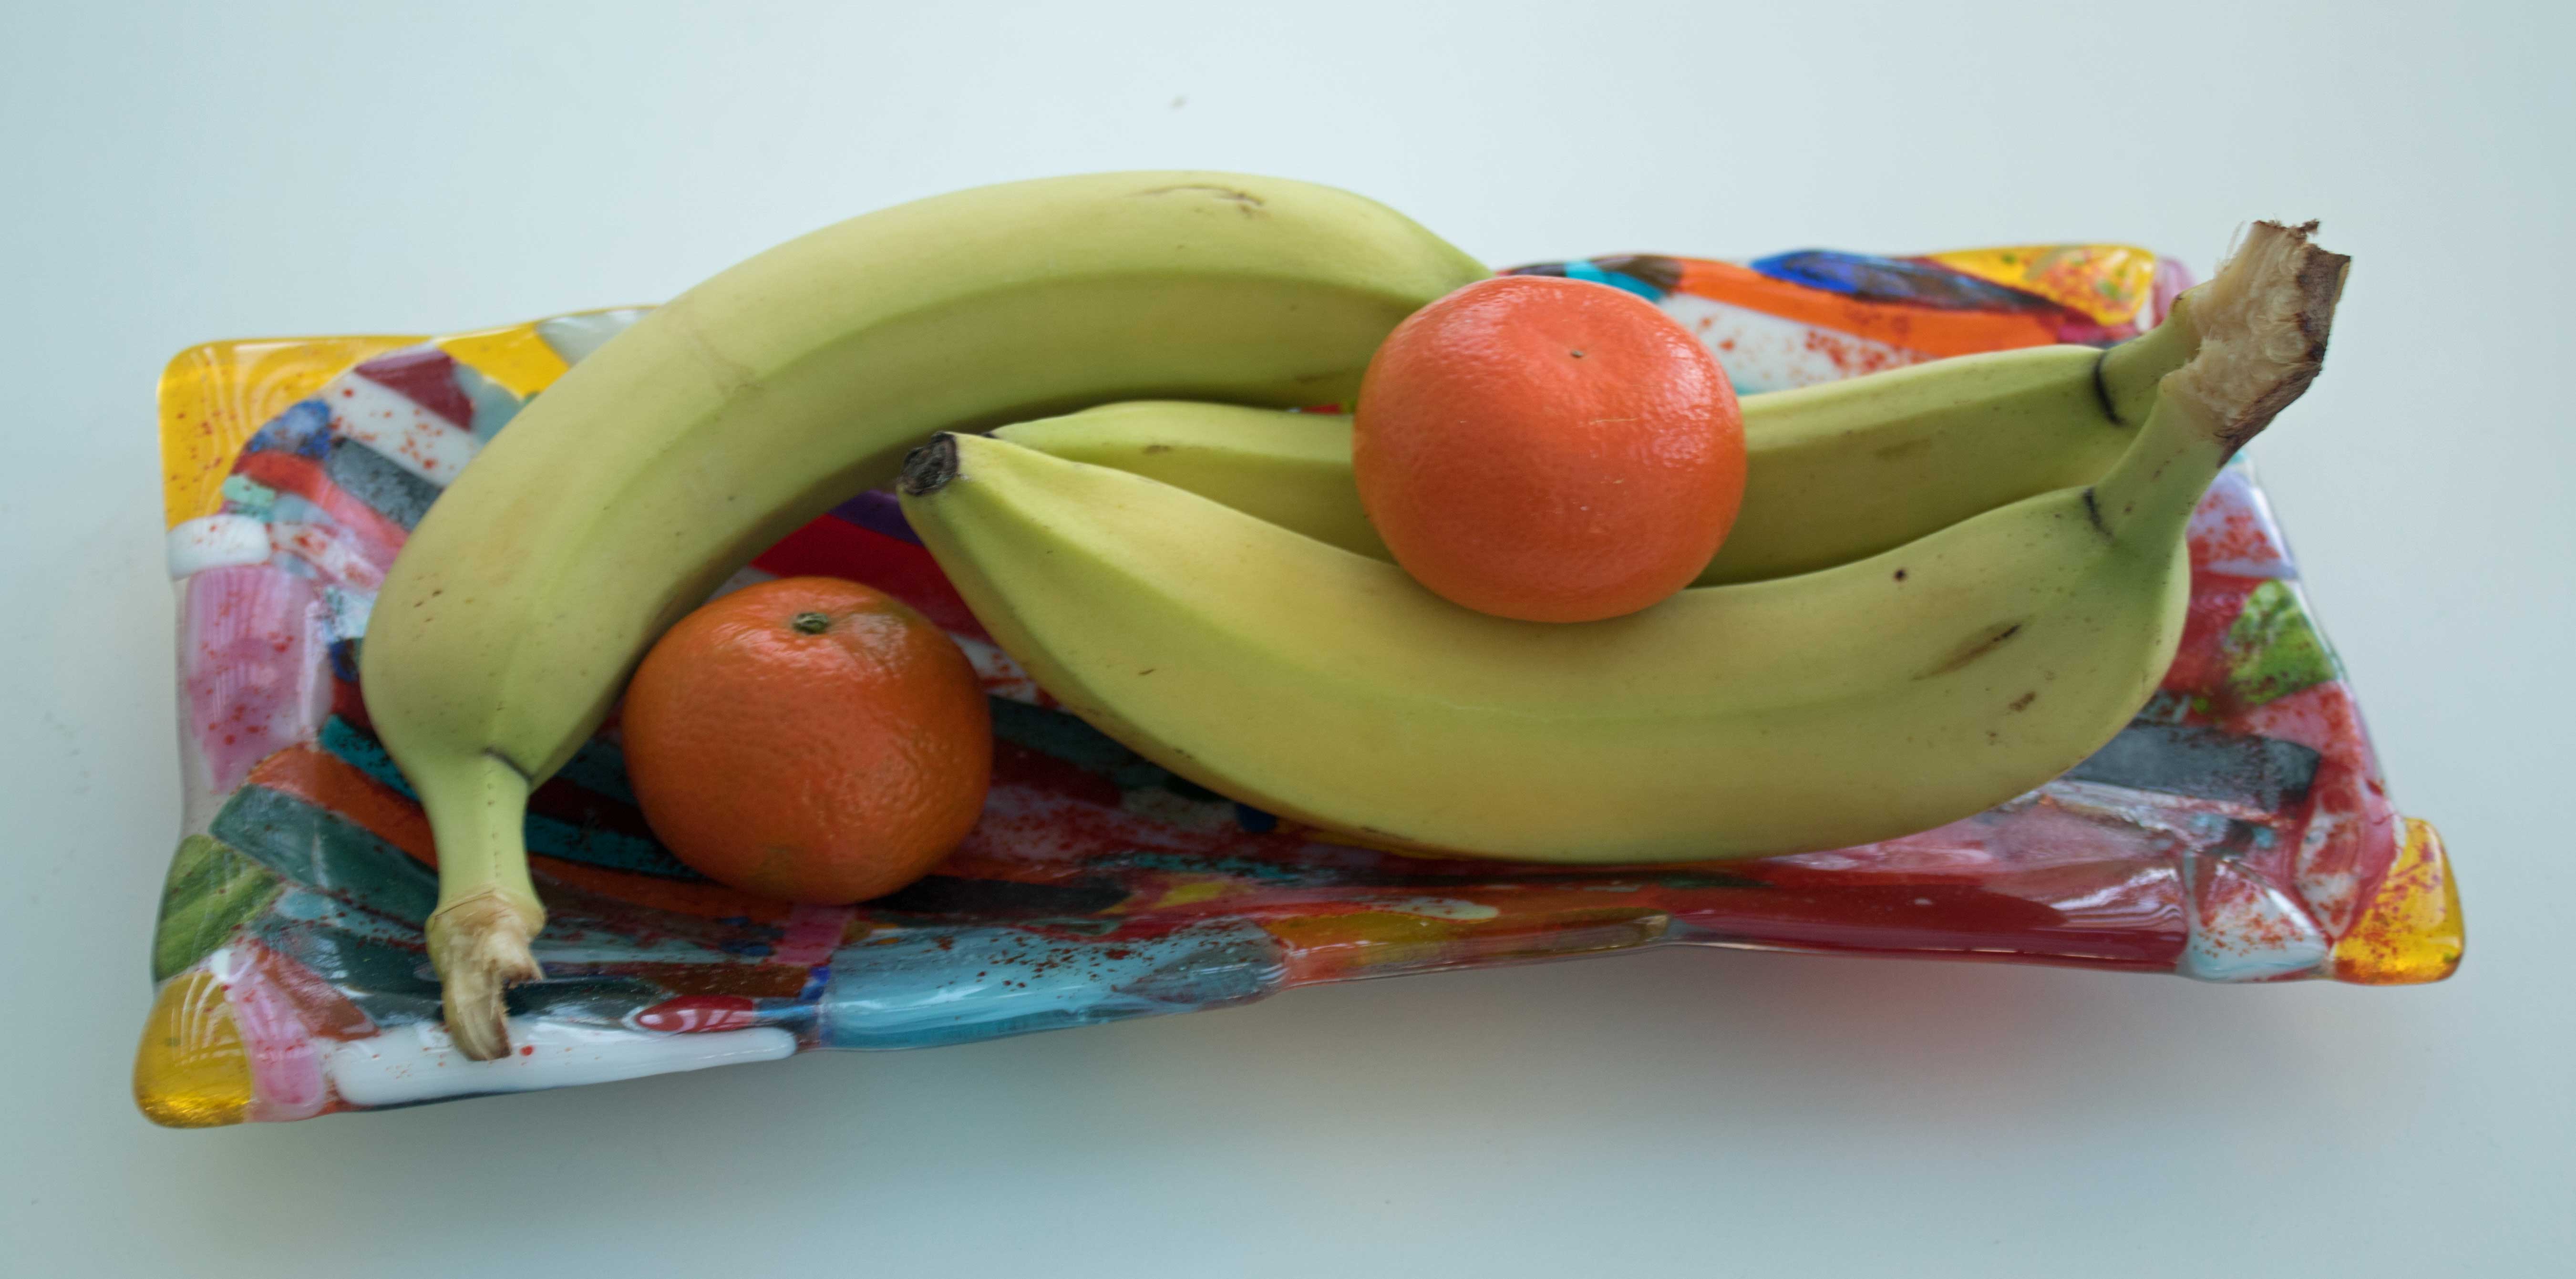 For some strange reason I really enjoyed making this piece.
It took a three stage process to get it finished:
a) Cut the glass and assemble
b) Full Fuse to get all the glass into a single piece
c) Slump Fuse to get the shape
It's made from a single sheet of clear glass which was cut to size. I then sorted out some of the coloured offcuts, and arranged them on top of the clear glass. As you can imagine, the offcuts are all sorts of shapes, and no amount of arranging and re-arranging them covered the complete clear sheet - there were gaps left. To leave it like that would have resulted in the suface of the bowl being pitted and potentially have holes appear - not a good thing. So I used some red frit - crushed glass - to grout between the offcuts. I had intended to brush the red frit off the surface, just leaving it in the gaps. But I liked the look, so I left it. Stage one over.
Into the kiln then for a full fuse, taking the temperature up to around 800 c and then cooling on a carefully
controlled cycle to ensure that all the stresses introduced by the heating are allowed to relax. Stage two complete once we returned to room temperature.
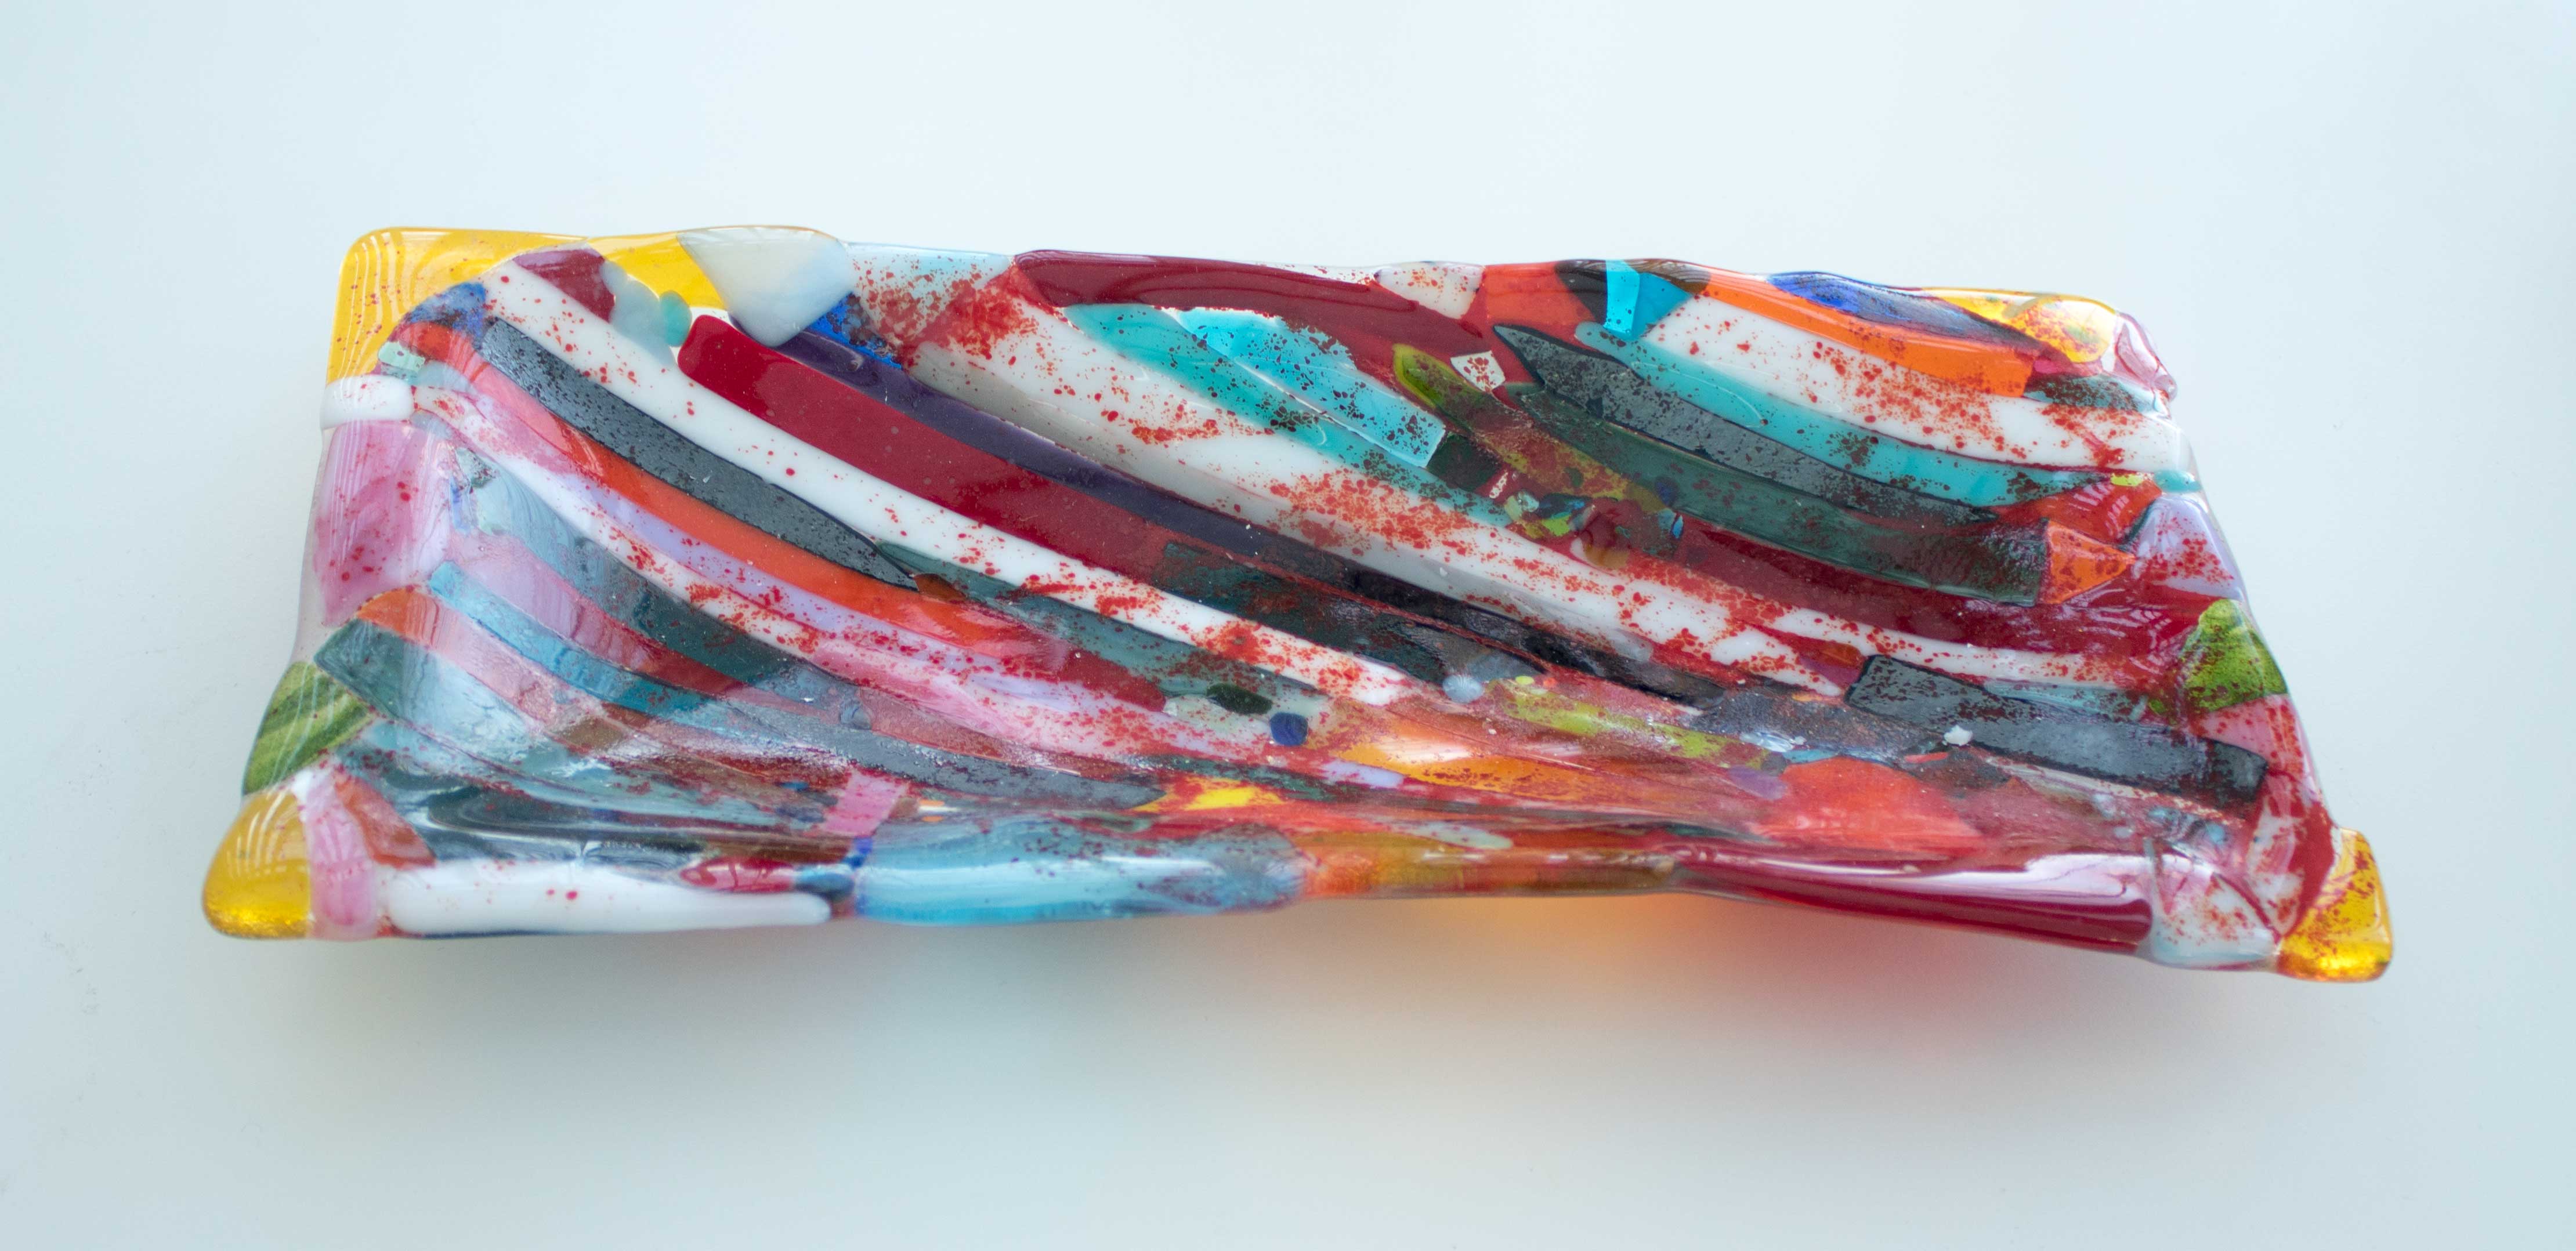 Then the slightly unexpected part - shaping the bowl. I have a number of standard plate and dish moulds, but I didn't have one the shape that I wanted. Research on the internet (Google is everyones friend) gave up the technique of using chalk to shape glass in the kiln. A quick run out to Hobbycraft (other chalk suppliers are available) found a box of fat chalks ready to make a mould. I made a rectangle of chalks the outline of teh bowl I wanted and covered this with a thin sheet of fibre paper to soften the edges. Then into the kiln for a slump fuse which is hot enough to get the glass to take a new shape using gravity, without going really runny. Once back out of the kiln, and I was delighted with the results.
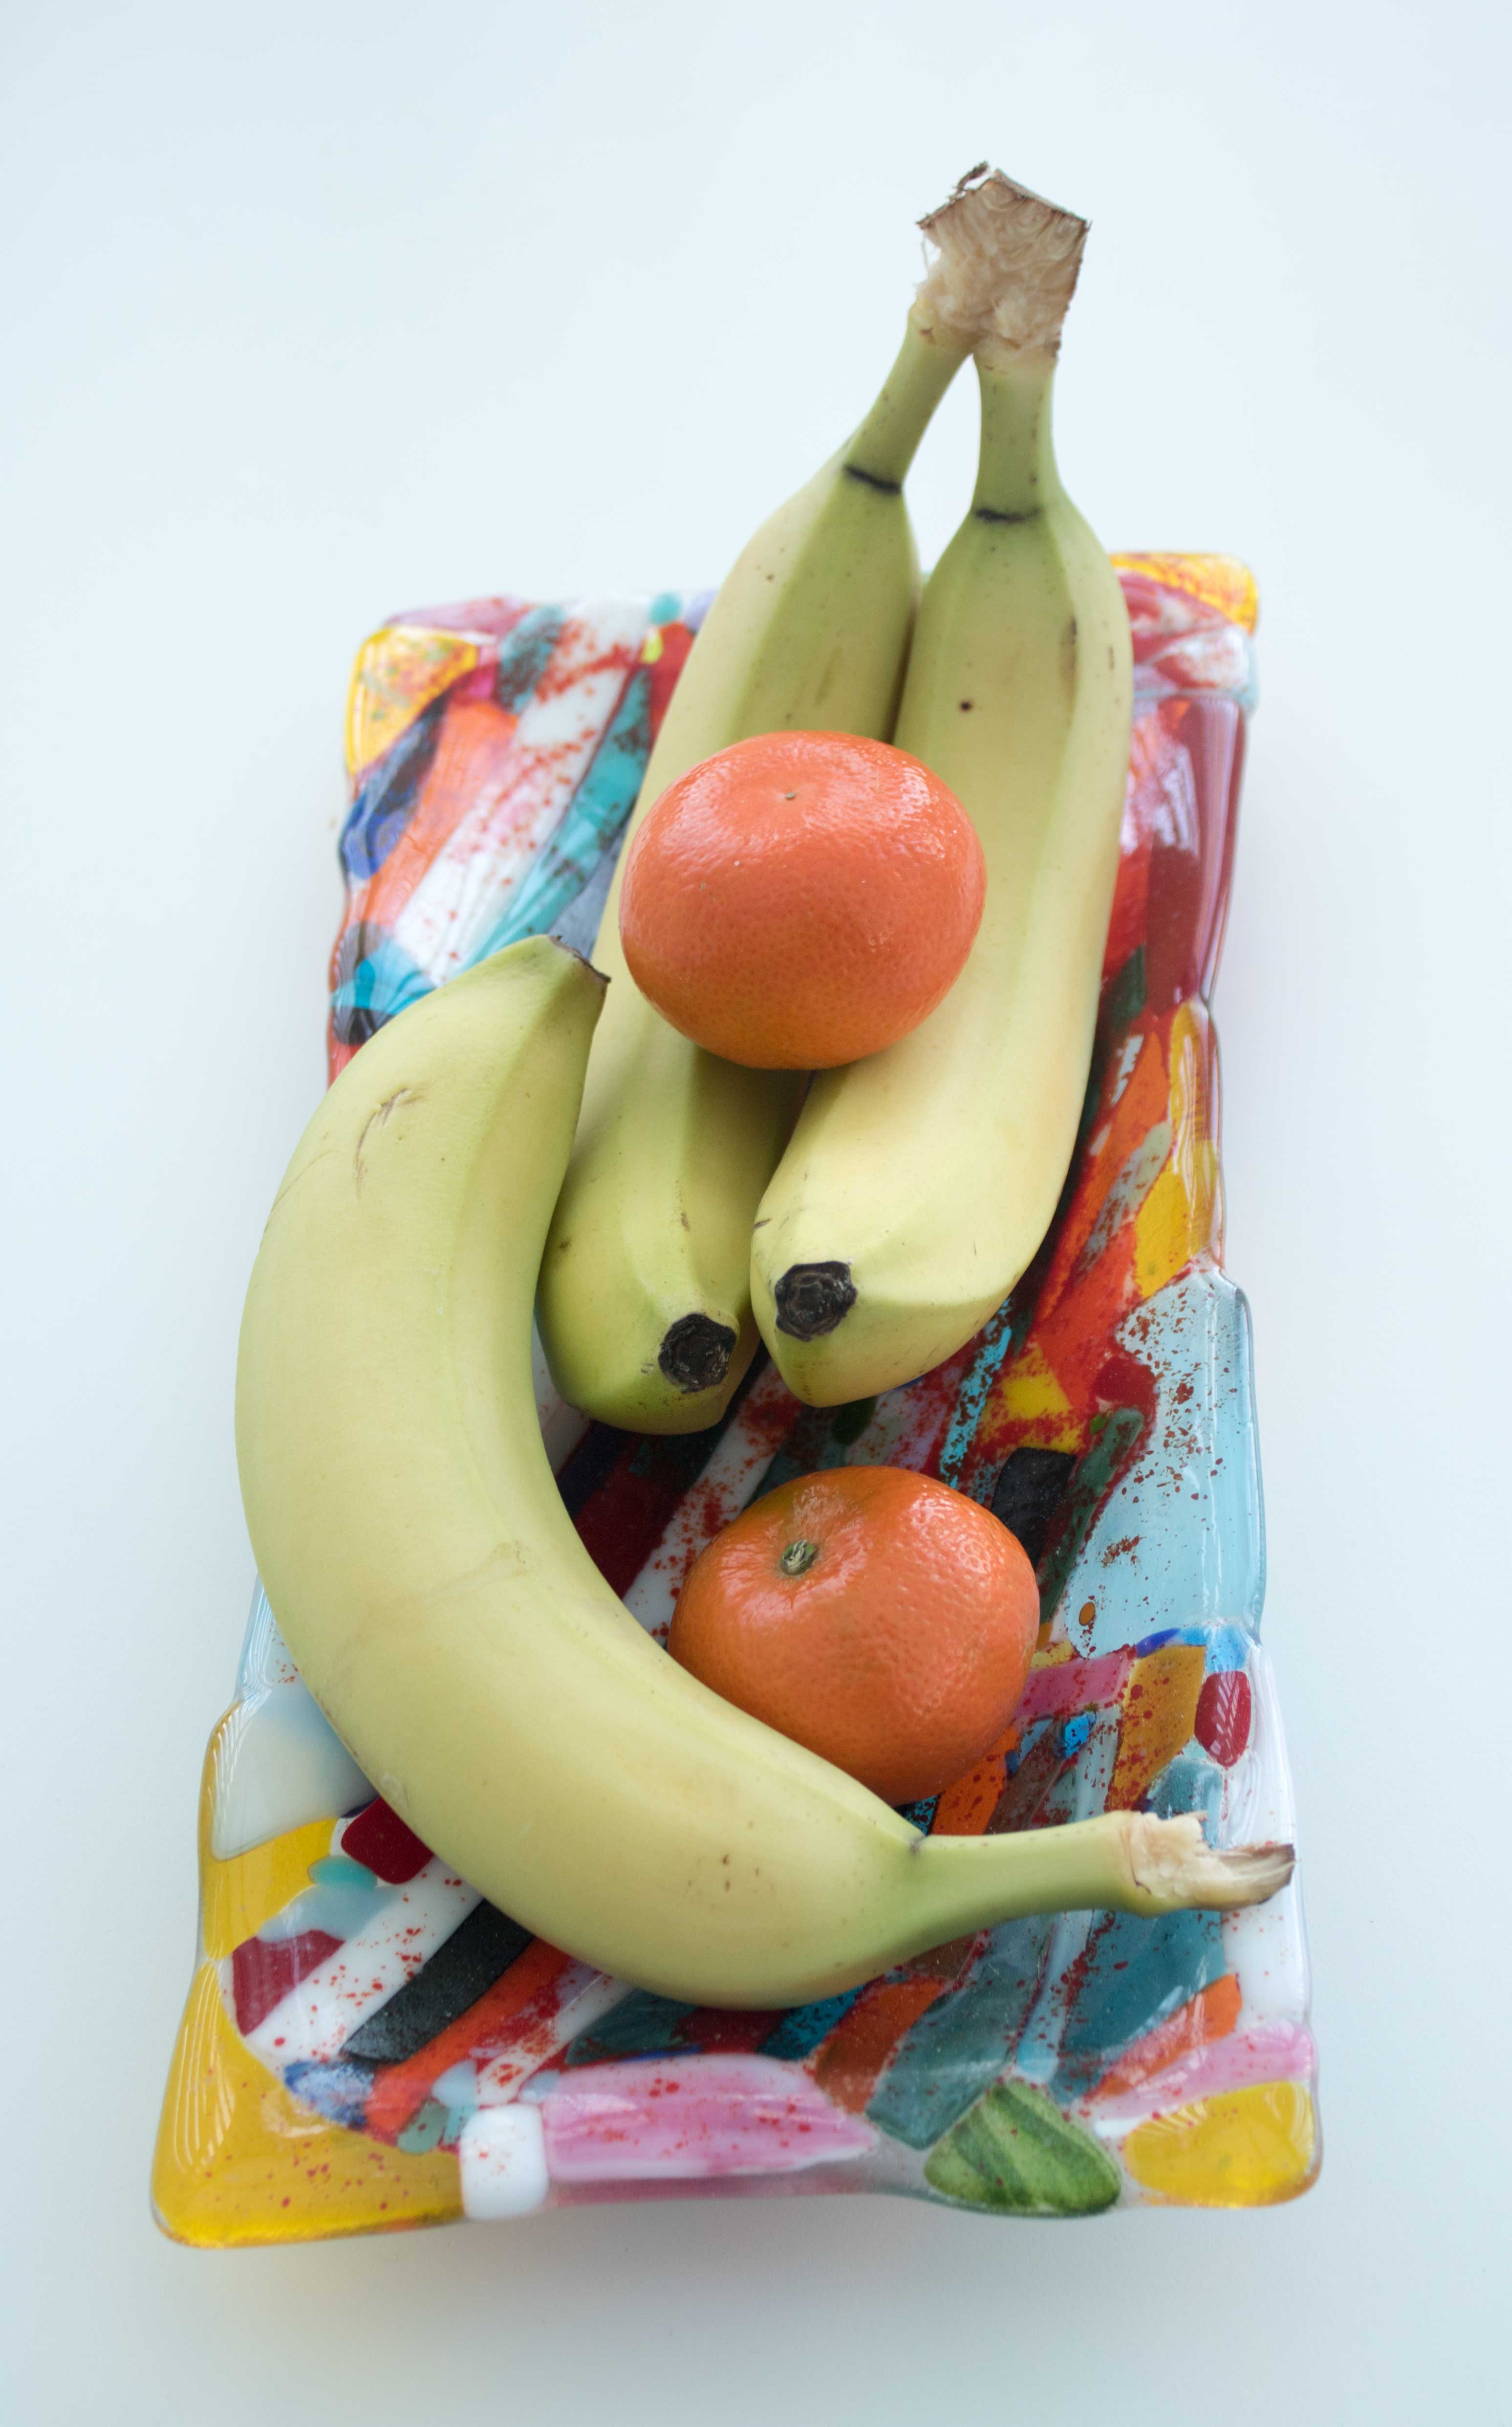
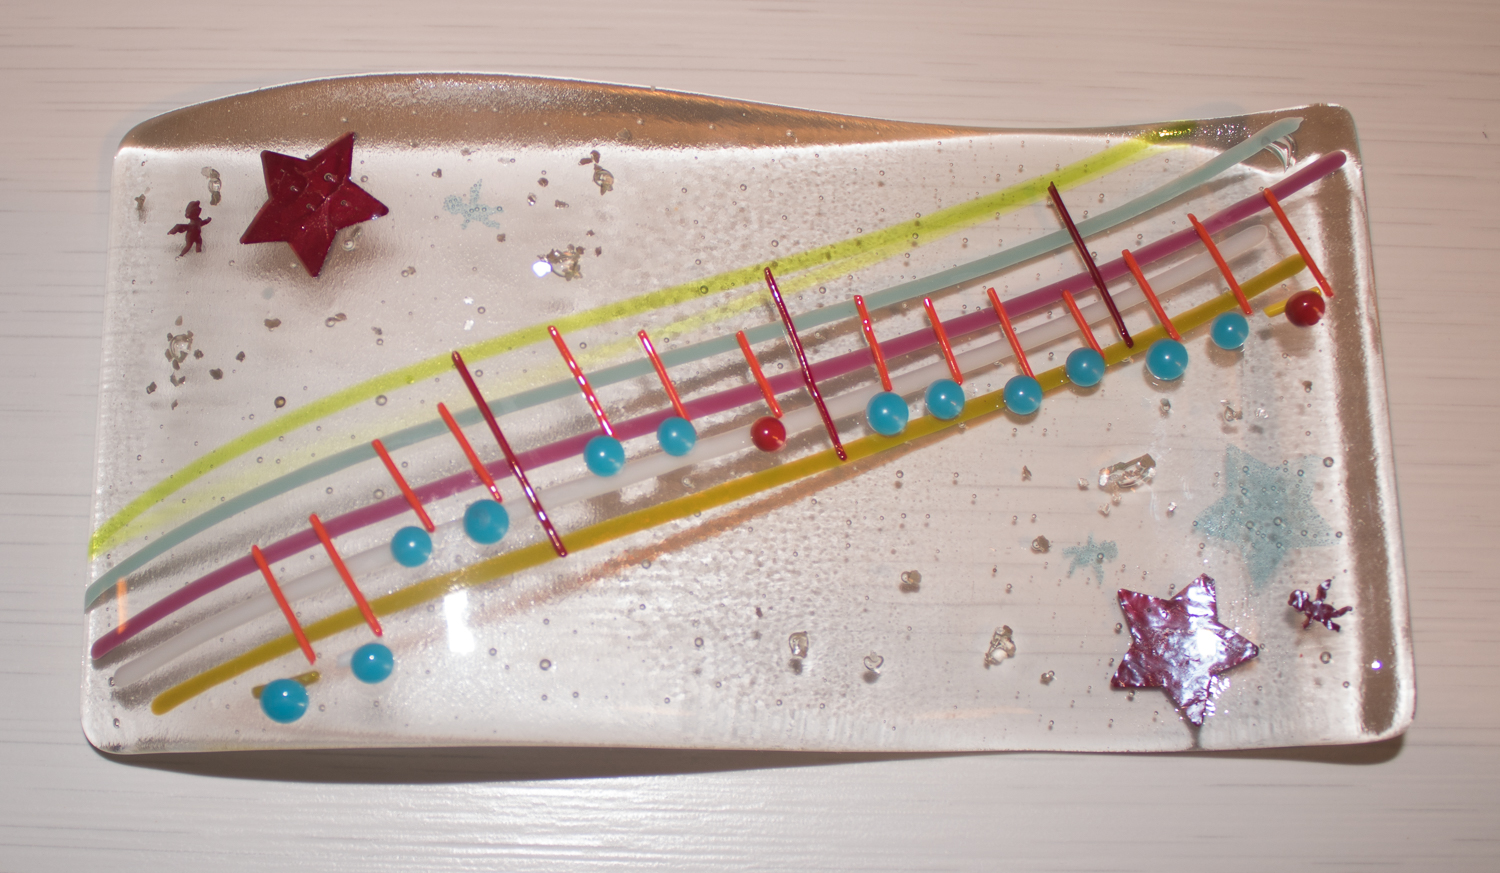
Here's a challenge for you - Name That Tune!
This piece was made by SWMBO, and is a real tune that most of you will know.
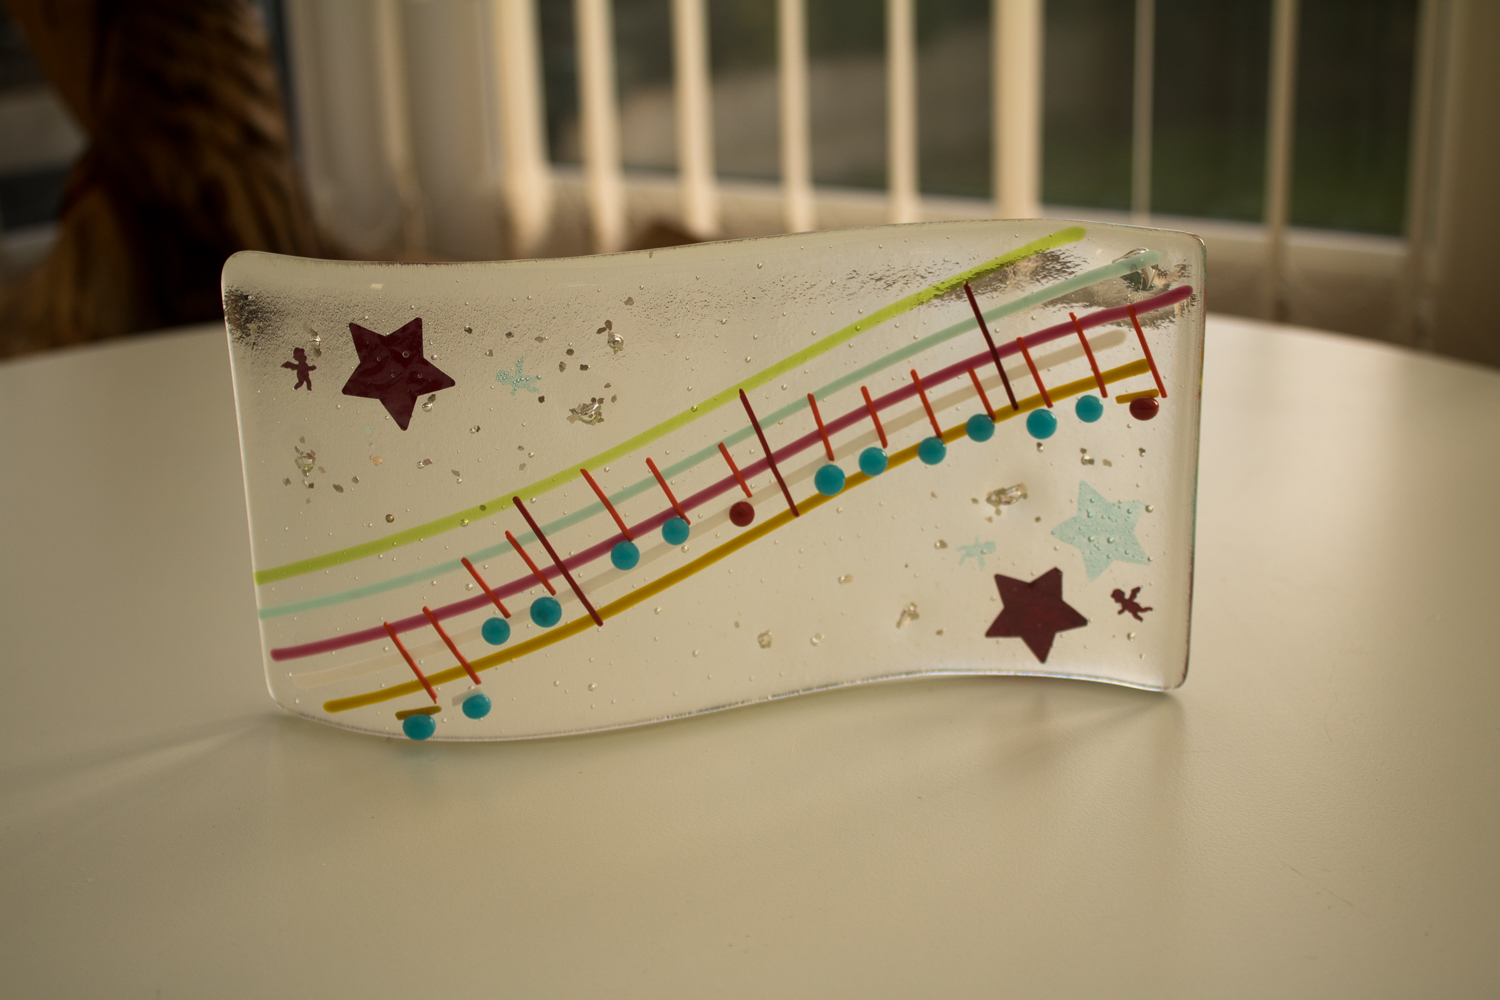
It was quite a lengthy project as it required 3 firings in the kiln.
The stars were cut from thin copper foil and were sandwiched between two sheets of clear glass that had been hand-cut to shape. The coloured staves are made from thin glass rods called Stringers. These were positioned on top of the glass sandwich before firing for a full fuse to give a smooth finish.
The notes are made from dots clipped from a glass rod, with short stringers. Once the piece had cooled, the notes were carefully positioned and held in place using Aloe Vera gel (which burns away in the kiln without leaving a residue). This time we used a tac fuse to securely stick the notes to the flat sheet glass.
When the piece had cooled again, it was placed over a ceramic mould and fired for a slump fuse, which gave it its final wave shape. That's a total of around 24 hours in the kiln!
It measures approximately 20 cm x 10.5 cm with a double wave that's about 2.5 cm deep.
Email us at This email address is being protected from spambots. You need JavaScript enabled to view it. with your guess to the name of the tune - no prizes - it's just for fun.

 We went on an adventure in May of 2019, following in the footsteps of my Grandfather, who served in the 8th Battallion of the South Staffs Regiment during the 1914 - 1918 war. We researched where he had fought and were fortunate to find a guide who took us to some of those places so that we could walk in his footsteps. Pop survived and returned to his family in the UK. So many were not as fortunate.
This is our small tribute to those who fell in that war, and in those that followed.
For each of these pieces sold we will donate £5 to the British Legion Poppy Appeal.
If you want to puchase any of these pieces, please email us at This email address is being protected from spambots. You need JavaScript enabled to view it. quoting the item reference which can be found by moving the mouse over the image of the item. We'll come back to you with the cost of the item and P&P options.
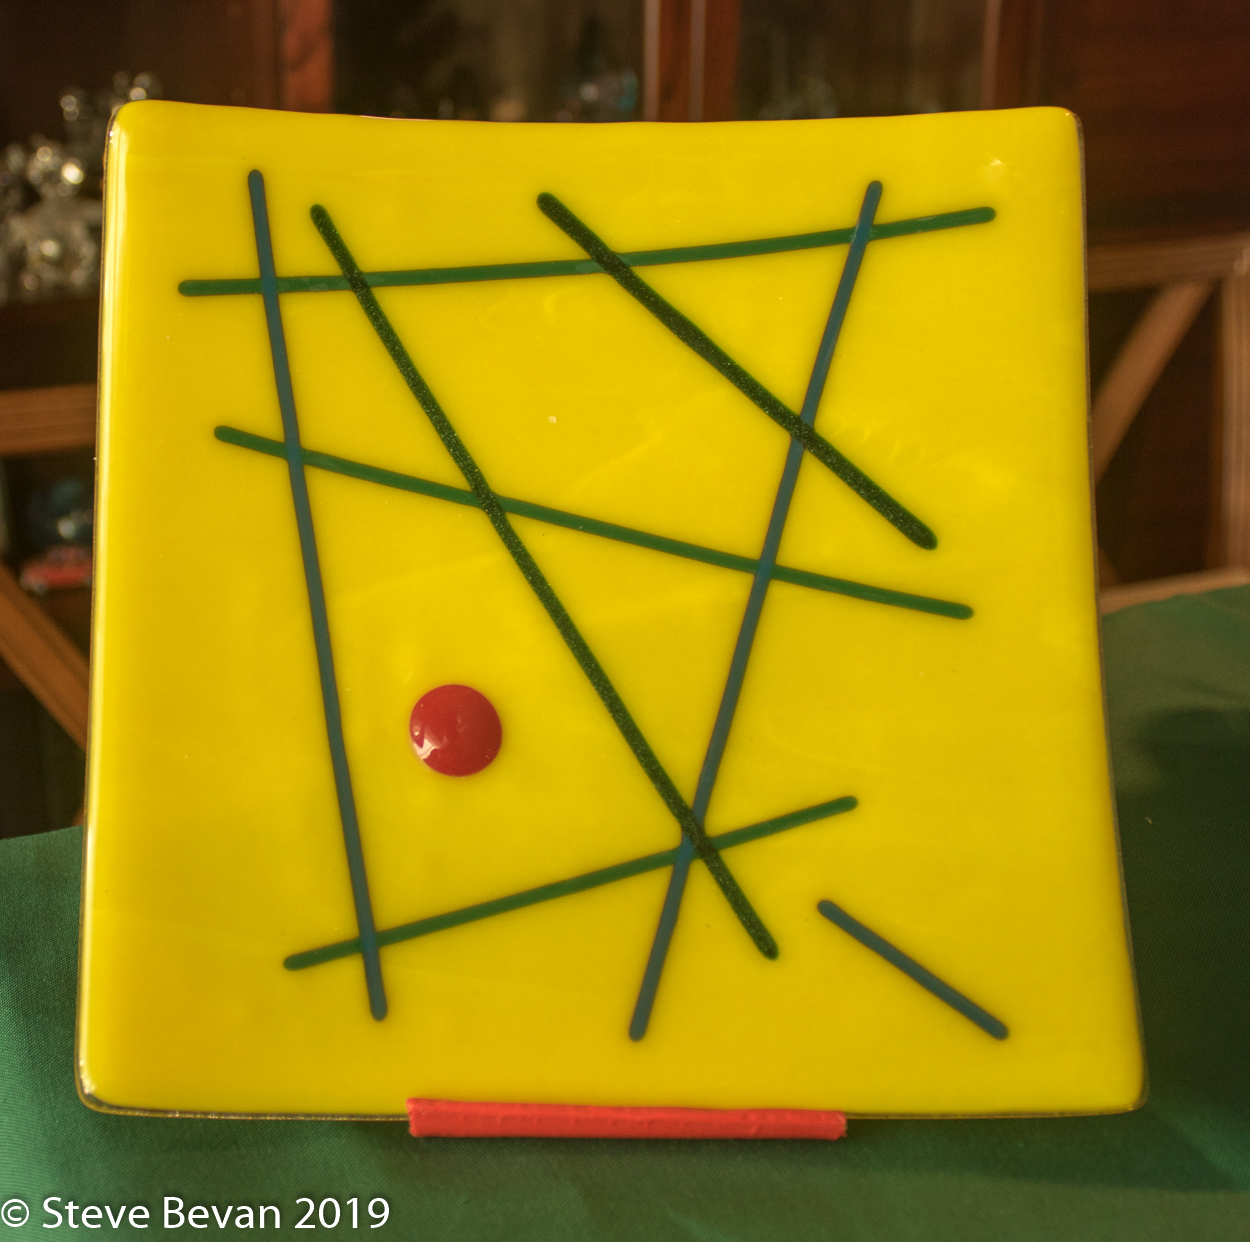
Same Design - Different Colours
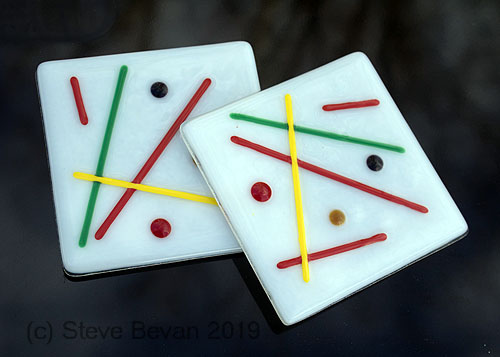
Here are two examples  of how a design looks different when it's executed using different colours.
Both the coasters and the platters are made using basically the same techniques, with the coasters being 10cm squares and the platters being 20cm squares in a shallow dish.
All the flat glass is hand-cut to size. Each coaster or platter needs a square of coloured glass as the base, and a square of clear glass to go on top. We've then laid out some thin glass 'Stringers' in a selection of contrasting colours, and added a few glass dots.

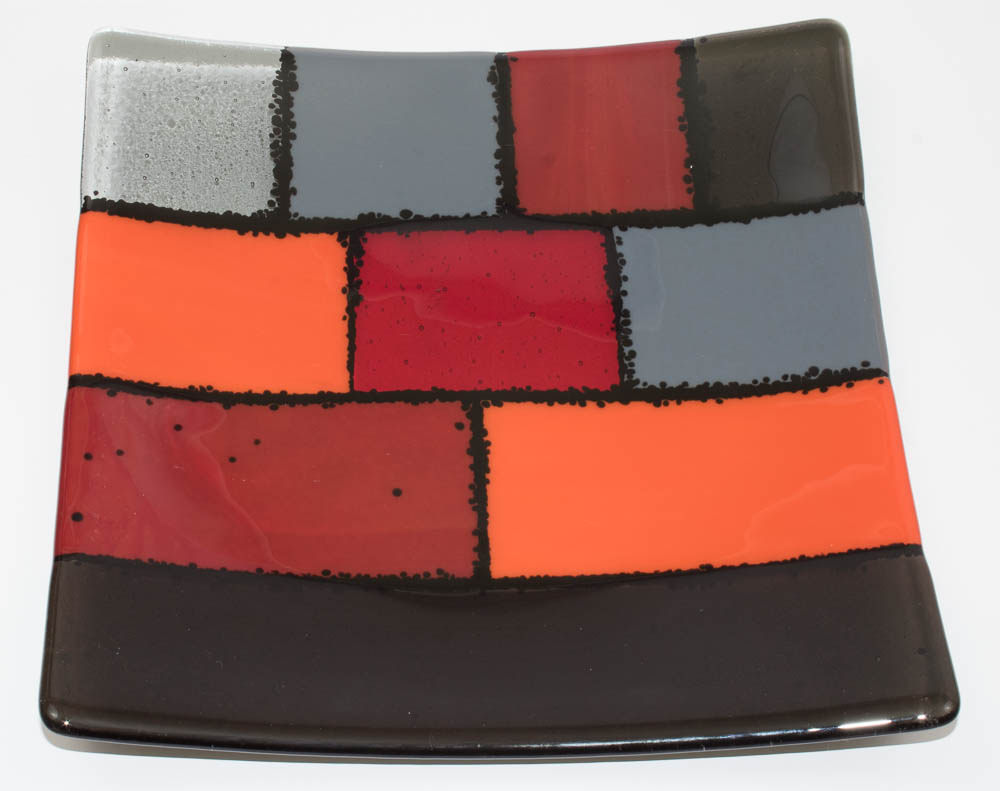 I absolutely LOVE this piece, possibly because it was one of the first pieces I made.
It is constructed like a jigsaw puzzle, with each piece of coloured glass being placed on a single piece of clear glass that makes the base. Each of the coloured shapes was cut to size and shape by hand, and the whole thing was trial-fitted to check the fit, with some minor adjustments being made to ensure that there was a small gap between each piece of the jigsaw. Once I was happy that the pieces fitted, it was time to fill in the gaps between each shape. Think about grouting the bathroom tiles, but instead of a paste, I used powdered black glass, known as Frit. I used a small spoon to pour frit into the gaps, and then spent ages carefully using a small paintbrush to remove any specks of black glass that didn't go into the gaps. If you look carefully you can see some black flecks on the deep orange rectangle - I'm sure I didnt leave those there!
A Full Fuse to over 800 C melted all the coloured pieces, frit and clear base into a single 20cm square, which was then Slumped into a shallow ceramic mould to give it a dish shape.
This one is on dispay at home, and is not for sale, but we have other similar platters in other colours.
- You are here:
-
Home

-
Fused Glass
- Bowls & Flatware